


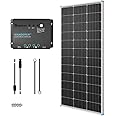
Renogy 100W 12V Solar Panel Starter Kit, 100 Watt Monocrystalline Solar Panel, 30A LCD PWM Charger Controller, Adaptor Kit, Tray Cables, Z Brackets for RV, Camper, and Other Off Grid Applications
Details
- BrandRenogy
- MaterialAluminum
- Product Dimensions43.58"L x x
- Item Weight14.1 Pounds
- EfficiencyHigh


Description
🌞 Harness the sun, own your adventure—power up with Renogy!
- SMART REMOTE MONITORING - Stay connected with Bluetooth-enabled charge controller and real-time app alerts for system health.
- DECADE LONG PEACE OF MIND - Industry-leading 10-year panel warranty plus 25-year power output guarantee keeps you worry-free.
- EXPAND YOUR ENERGY HORIZON - Supports up to 400W total with AGM, Gel, Flooded, and Lithium battery compatibility for future upgrades.
- BUILT TO BRAVE THE ELEMENTS - Certified to withstand 2400Pa wind and 5400Pa snow loads with IP65/IP67 weatherproof connectors.
- POWER YOUR OFF GRID LIFESTYLE - Generate up to 500Wh daily with a sleek 100W monocrystalline panel—perfect for RVs and campers.
The Renogy 100W 12V Solar Panel Starter Kit combines a high-efficiency monocrystalline panel with a 30A PWM charge controller, delivering reliable off-grid power for RVs, campers, and remote applications. Engineered for durability with top-tier certifications and weatherproofing, it offers remote Bluetooth monitoring and expandable capacity up to 400W. Backed by a comprehensive 10-year warranty and 25-year power output guarantee, this kit is your trusted partner for sustainable, mobile energy independence.
Specifications
| Brand | Renogy |
| Material | Aluminum |
| Product Dimensions | 43.58"L x 22.72"W x 2.95"H |
| Item Weight | 14.1 Pounds |
| Efficiency | High Efficiency |
| Connector Type | MC4 |
| Included Components | cable |
| AC Adapter Current | 30 Amps |
| Maximum Voltage | 12 Volts |
| Maximum Power | 100 Watts |
| Special Feature | Lightweight Design |
| UPC | 799475028984 |
| Global Trade Identification Number | 00816360020486 |
| Output Voltage | 12 Volts |
| Manufacturer | Renogy |
| Part Number | 107.4, 49.8, 3.5 |
| Item Weight | 14.1 pounds |
| Country of Origin | Thailand |
| Item model number | KIT-STARTER-100D |
| Is Discontinued By Manufacturer | No |
| Size | 100W Panel+PWM 30A Controller |
| Color | with Monocrystalline 100 Watt Solar Panel, 30A LCD PWM Charge Controller, Adaptor Kit, Tray Cables, Mounting Z Brackets |
| Style | Cables+Mounts |
| Power Source | Solar Powered |
| Wattage | 100 watts |
| Item Package Quantity | 1 |
| Special Features | Lightweight Design |
| Batteries Included? | No |
| Batteries Required? | No |
| Warranty Description | Power Output Warranty |
Have a Question? See What Others Asked
Reviews
S**P
Quality and Reliable Name, Great Price and Perfect Product for my application
Renogy 100 Watts 12 Volts Monocrystalline Solar Starter Kit w/100W Solar Panel + 30A PWM Negative ground Charge Controller + MC4 Connectors +Tray Cable+ Mounting Z Brackets for RV, BoatI purchased this to install on the Roof of my Jeep wrangler (overland built) to serve as a way to charge an auxiliary deep cycle battery which powers my permanently mounted ARB fridge as well as all the camp LED lights and recharge phones and electronic equipment. I was fairly new at this solar thing but did a ton of research on the subject before settling on this. There are tons of off-brand products in this category as well as a vast array of pricing options, both higher and lower than this set up. However, after careful consideration and countless review reading and youtube watching, I decided that this set up was best suited for my application.The problem: I built my Jeep to do some overlanding and one thing that I cannot live with is my ARB fridge which is permanently mounted in the kitchen which sits in the back of the car. The car doesn't have a dual battery system and so the fridge is/was plugged into the cranking battery which is not optimal as you do run the risk of the fridge draining your cranking battery and leaving you stranded (NOTE: Fridge does have a shut off feature which measures the voltage of the battery and turn itself off if said voltage is below "x" volts. Also my Jeep is a standard so I can push it / get a quick tow to get it started and I do always have a battery pack / starter as a precaution...).The solution: Getting an auxiliary battery to supply the fridge (and other accessories) and a solar panel to keep this battery topped off while at camp and on the road.I chose Renogy after my many hours of research because of the name brand recognition and the the many reviews that seem to point at a great company with solid products and good support. So far I can say that the reviews are 100% correct in that I made the right choice. The package arrived well wrapped and precisely as advertised. The panel is solidly built and all the cabling provided is the correct gauge with the proper connectors. I really wanted to get a name brand Charge controller after reading that cheaply made units can both be highly inefficient and could be dangerous. In hindsight I probably would rather the version of the solar charge controller than has the integrated LED screen providing the charging and consumption metrics but price point on this project was met with the simpler unit. I am using some third party units to measure charging metrics and load usage which is fine but does require more wiring.The panel comes with all the brackets to install in on a flat surface and my guess is that 90% of the time people will need to do some custom installation of sort so these brackets, although perfectly adequate for a flat install are useless to me at the moment. All the connections are well made and this gives me no reason to believe that they will not last a long time. Right now in full sun and FLAT on my roof rack (note: flat is not optimal as the sun is never perfectly perpendicular to the panel and a 45 degree angle would be better to adjust for the that) the panel does produce about 5.5/6 AmpH and about 24 volts which according to what I calculated will be more than adequate to keep the smaller deep cycle (35amp hour) battery I am using topped off and run all the accessories I want to run off of it.I intent to post photos of the set up once it's complete as well as add to this review when i have had a chance to use the system to a greater extent.
T**A
Awesome for Camper!!! Self installed and set up.
Bought the 100watt kitt for a 24 foot travel trailer I am in the process of remodeling. I have (2) 12V 27 inch deep cycle marine batteries I picked up at a hardware store for 80 bucks each. for a total of 220 amp hours when topped off. They are wired in parallell.The panel was the easiest part of the install. just use butyll tape on the bottom of the brakets, screw onto roof, and then cover everything in lap sealant. I ran the cables down one of my vent cover holes which luckly was almost directly above where I wanted to mount the panel.Running the cables and getting the electronics set up was the biggest challenge. I ended up mounting the charge controller and fuses for the system under my travel trailers kitchen sink. I used a 1 foot by 1 foot piece of plywood. I wired up and installed as many components on the board as I could before installling. This made it easier to not be assembling everything under the sink.The Campers electrical box housing the fuses and converter box are a few feet away from my where I mounted my chage contoller undert the sink. rather than run from the charge controller directly to the battery I went into the electrical box and joined with the 6 guage wires already going from the converter to the battery. This saved me alot of money on cable!I finished installing on a sunday night. The sun was down and so I couldnt test right away. I turned on half the lights in the camper, the power vent, and left my 24 inch TV running off an inverter. I let these appliances drain on my power bank all night. I turned everything off monday morning. I saw that the green light was blinking which indicated that it was charging. By the time I got home for lunch 4 hours later the batteries were topped off. It has been installed for a week now and the batteries have never gone below 70% full with full usage of the appliances.I also purchased a volt meter/usb charger/12v socket so I can measure the voltage and charge things, as you can see in one of the pictures.I am not an electrician. I know very little about electricity. I think this was a fairly easy project that turned out awesome. I am very happy with the Renogy proucts they seem durable and have lived up to the other great reviews I read. I would suggest this brand and prouct to anyone looking to try out solar power. I was very impressed!!! You should buy this for your camper you wont be disappointed.
Common Questions
Trustpilot
1 month ago
2 months ago
